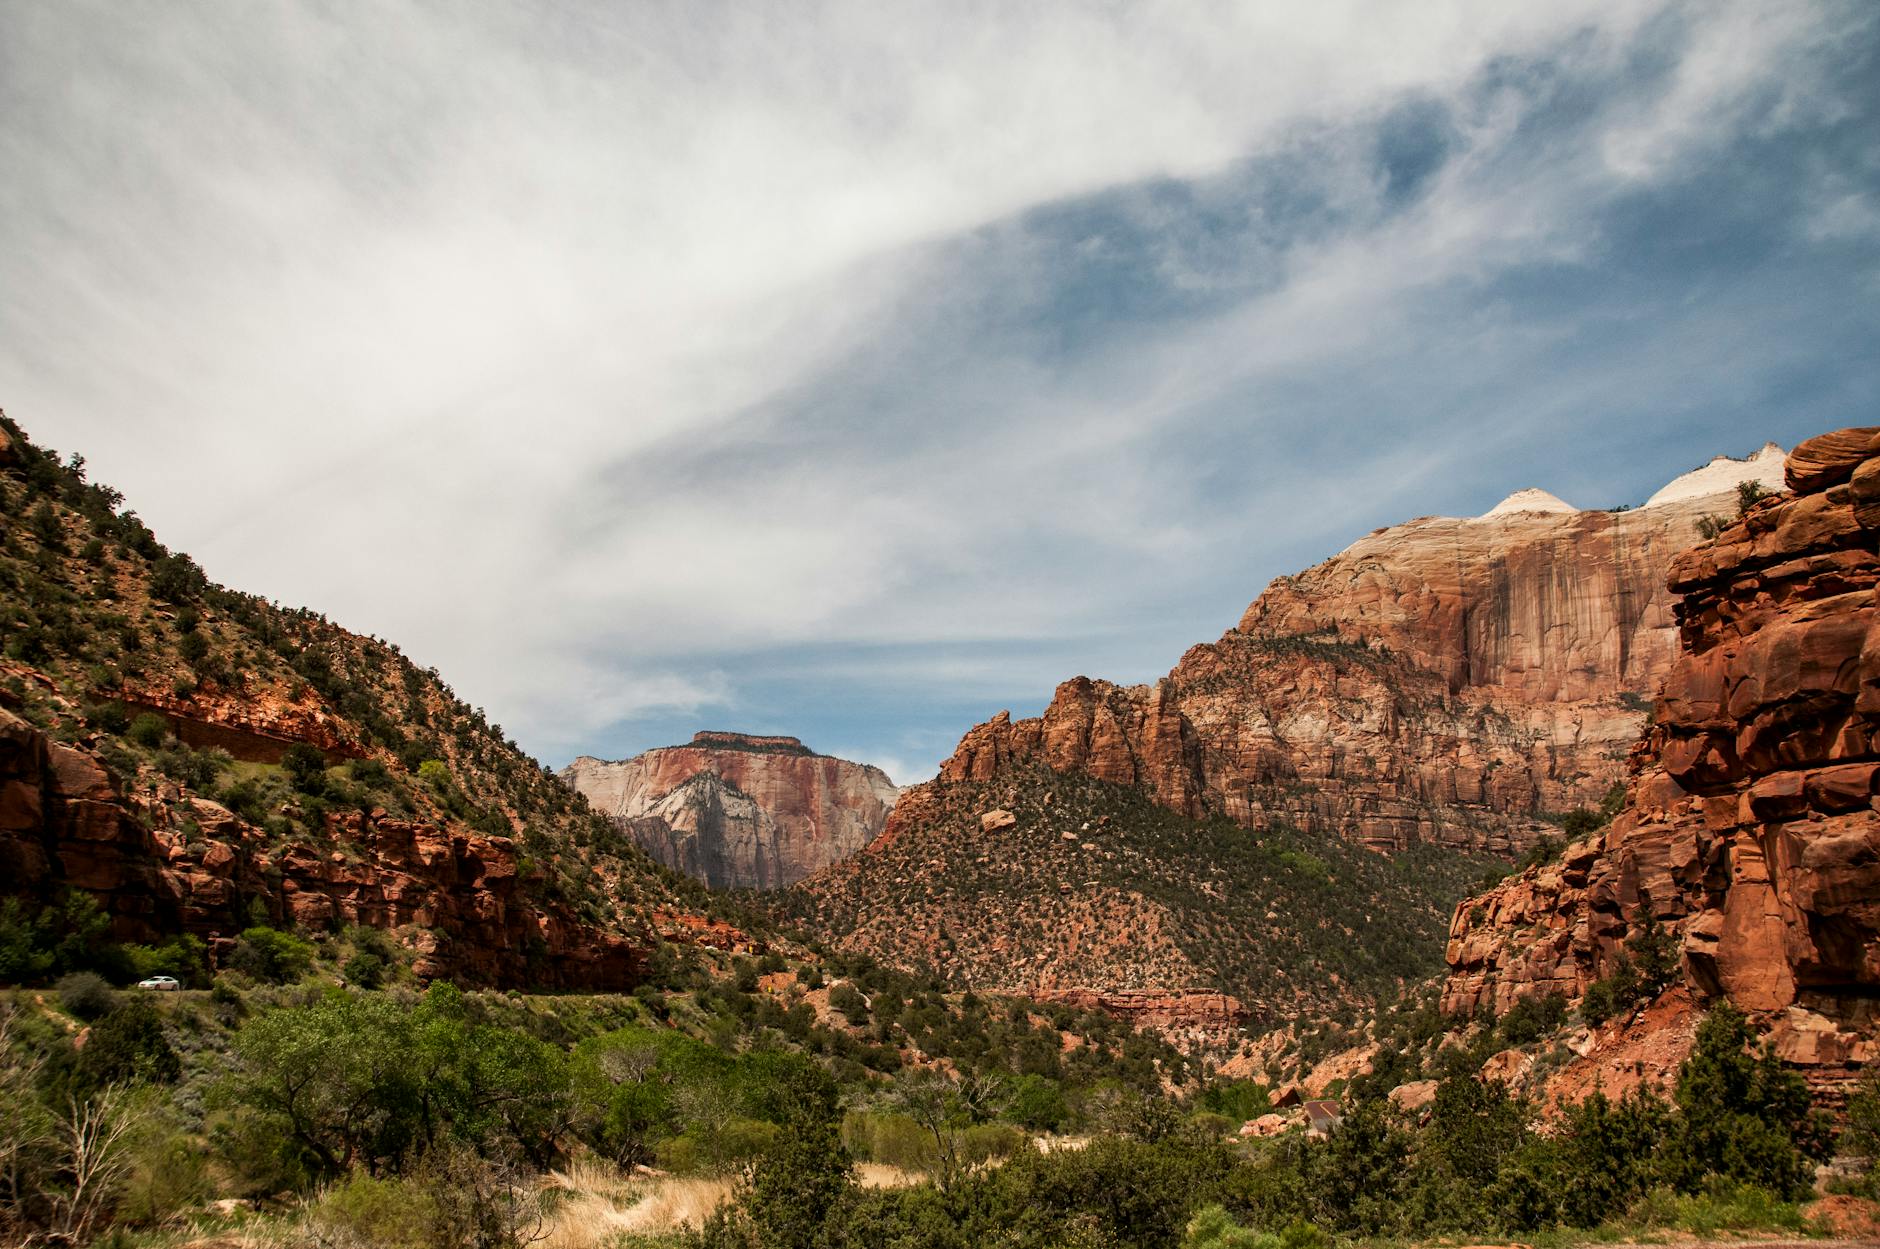
The Watchman at sunset from Canyon Junction Bridge — Zion’s most iconic shot.
Zion is a photographer’s dream — towering sandstone cliffs that glow crimson at golden hour, a river winding through a slot canyon, and viewpoints that look unreal even straight off the camera. But knowing where and when to point your lens makes all the difference between a nice snapshot and a frame-worthy shot.
Here are the best photo spots in Zion National Park, plus the timing tricks that turn good photos into great ones.
Key Takeaways
The Watchman at sunset is Zion’s most iconic shot — go early for a tripod spot.
Canyon Overlook is the best sunrise view for minimal effort.
Golden hour (just after sunrise, just before sunset) makes the red rock glow.
Use the park shuttle to reach most canyon viewpoints in busy seasons.
A tripod and a polarizing filter are your two best friends here.
Quick Facts
📍 Park
Zion National Park, Utah
📸 Top spots
The Watchman, Canyon Overlook, The Narrows
🌅 Best light
Sunrise & golden hour (deep canyon = short light)
🚐 Getting around
Park shuttle (required in the canyon in peak season)
🎒 Bring
Tripod, polarizing filter, wide + zoom lenses
🎟️ Permits
Angels Landing requires a lottery permit
When the Light Is Best
In a deep canyon like Zion, the sun arrives late and leaves early, so timing is everything:
Sunrise: Soft light hits the upper cliffs first — magical from high overlooks.
Golden hour (early morning / late afternoon): The red rock truly glows.
Midday: Harsh and contrasty — better for slot canyons and shaded spots like The Narrows.
Blue hour (just after sunset): Beautiful cool tones, especially along the river.
The 15 Best Photo Spots
1. The Watchman from Canyon Junction Bridge
The classic Zion shot: the Virgin River leading your eye toward the Watchman peak, glowing at sunset. Arrive 30-45 minutes early — this spot gets crowded with tripods.
2. Canyon Overlook
A short, rewarding trail to a sweeping canyon view. Spectacular at sunrise and far less effort than the big hikes.
3. The Narrows
Inside the slot canyon, soft reflected light bounces off the walls. Best shot midday when light filters down. Protect your gear from the water.
4. Towers of the Virgin (from the Human History Museum)
A legendary sunrise spot — the first light hits this row of peaks beautifully.
5. Angels Landing / Scout Lookout
If you have the permit and nerve, the views down-canyon are unreal. Even Scout Lookout (before the chains) offers stunning frames.
6. The Virgin River & Cottonwoods
Along the Riverside Walk and Pa’rus Trail — golden cottonwood trees in fall against red cliffs are a dream.
7. Court of the Patriarchs
A quick viewpoint of three towering peaks — best in morning light.
8. Big Bend
A shuttle stop with dramatic views of the Great White Throne and Angels Landing — great for catching climbers and golden light high on the walls.
9. Pa’rus Trail
Open, flat, and tripod-friendly, with river-and-cliff compositions and some of the best blue hour shots.
10. The Watchman Trail Viewpoint
A moderate hike to a higher angle over the canyon and Watchman — beautiful late afternoon.
11. Checkerboard Mesa
On the park’s east side (Highway 9) — the cross-hatched sandstone is unique and best in side light.
12. The Zion–Mt. Carmel Highway & Tunnel area
The east side offers slickrock, pinyon pines, and bighorn sheep — a totally different look from the main canyon.
13. Weeping Rock area
Lush, dripping alcoves and hanging gardens (check current trail status, as conditions change).
14. Emerald Pools
Waterfalls and reflective pools tucked against the cliffs — great in soft light.
15. The Subway (permit + advanced hike)
For experienced canyoneers with a permit — one of the most photographed slot formations anywhere.
Gear Tips for Zion
Tripod — essential for sunrise/sunset, blue hour, and silky water shots.
Polarizing filter — cuts glare and deepens those red-rock-and-blue-sky contrasts.
Wide-angle lens for the canyon scale; a mid-zoom for compressing distant peaks.
Lens cloth + dry bag for The Narrows and any water spots.
Headlamp for pre-sunrise hikes to viewpoints.
Best Time of Year for Zion Photography
Each season gives Zion a different look:
Fall (late Oct–Nov): The cottonwoods along the Virgin River turn brilliant gold against the red cliffs — arguably the most photogenic season.
Winter: Occasional snow dusts the red rock for striking, uncrowded contrast shots; soft, low light all day.
Spring: Lush green, flowing water, and full Emerald Pools, though spring can be busy.
Summer (monsoon): Hot and crowded, but dramatic afternoon clouds — and even ephemeral waterfalls off the cliffs after storms — can create unforgettable frames (mind flash-flood safety).
A Sample Half-Day Shooting Plan
Want a ready-made plan to maximize the light? Try this:
Pre-sunrise: Hike up to Canyon Overlook for first light spilling across the canyon.
Early morning: Shoot Towers of the Virgin from the Human History Museum as the peaks catch warm light.
Midday: Ride the shuttle to The Narrows or Riverside Walk for soft, reflected canyon light.
Late afternoon: Position early at Canyon Junction Bridge for the Watchman.
Sunset to blue hour: Stay put as the Watchman glows, then move to the Pa’rus Trail for cool-toned river reflections.
This loop works around the shuttle and keeps you in the right place for each window of light.
A Quick Reflection
My favorite Zion frame almost didn’t happen. I’d planned to shoot the Watchman at sunset but arrived late to a wall of tripods already lined up on the bridge. Defeated, I wandered down to the Pa’rus Trail instead — and stumbled into blue hour with the cliffs reflected in a calm stretch of the Virgin River, not another photographer in sight. Sometimes the best shot is the one you find when Plan A falls apart. Stay flexible, and keep shooting after the sun goes down.
Getting Around for Photographers
In peak season the main canyon is car-free, so you’ll rely on the Zion Canyon shuttle to reach viewpoints like the Temple of Sinawava, Big Bend, and the Court of the Patriarchs — plan your sunrise and sunset shots around its first and last runs. The east side of the park (along the Zion–Mt. Carmel Highway) is drivable year-round, so for sunrise flexibility, Checkerboard Mesa and the slickrock pullouts are easy to reach by car without worrying about shuttle timing. In the off-season, when private vehicles are allowed back in the canyon, you regain full control of your schedule — a big advantage for chasing the best light.
Tips for Better Zion Photos
Arrive early for popular spots like Canyon Junction Bridge.
Shoot the shoulders of the day — golden hour and blue hour beat harsh midday.
Use the shuttle and plan around its schedule in busy seasons.
Include the river or a trail to lead the viewer’s eye into the frame.
Respect the landscape — stay on trails and don’t trample vegetation for a shot.
Scout your sunset spot at midday so you know exactly where to set up before the light show begins.
Shoot in RAW to recover the most detail in Zion’s high-contrast cliff-and-sky scenes.
FAQ
What is the best photo spot in Zion? The Watchman peak photographed from Canyon Junction Bridge at sunset is Zion’s most iconic shot, with the Virgin River leading toward the glowing peak.
What is the best time of day to photograph Zion? Golden hour — shortly after sunrise and before sunset — when the red cliffs glow. Because Zion is a deep canyon, high overlooks catch the best early and late light.
Do you need a permit to photograph Angels Landing? You need a permit to hike the final chained section of Angels Landing. You can photograph the views from Scout Lookout (before the chains) without that permit, and from many other canyon viewpoints freely.
Can you photograph The Narrows? Yes, and the soft reflected light inside the slot canyon is gorgeous, usually best around midday. Bring a dry bag and lens cloth to protect your gear from the water.
Can you fly a drone in Zion for photos? No — drones are prohibited in Zion and all national parks without a special permit, which is rarely granted. Stick to ground-based photography; the canyon’s natural viewpoints give you plenty to work with.
Before you go, confirm shuttle access and any permit rules on the official Zion National Park site.
Final Thoughts
Zion practically photographs itself — but show up at the right spot at the right hour and you’ll come home with images that look almost too good to be real. Chase the golden light, pack a tripod, and don’t pack up the second the sun dips. Some of Zion’s best frames happen in the quiet glow after sunset.